Why false rejection occurs
When there are numerous number of “Identify Fail” logs, it is highly that users’ fingerprint quality is low or the users did not place his/her finger correctly on the sensor.
Below is an example of users who are experiencing “Identify Fail”.
When there is false rejection issue after adjusting security level to solve false acceptance issue, users should re-enroll their fingerprint.
Analyzing false rejection issue
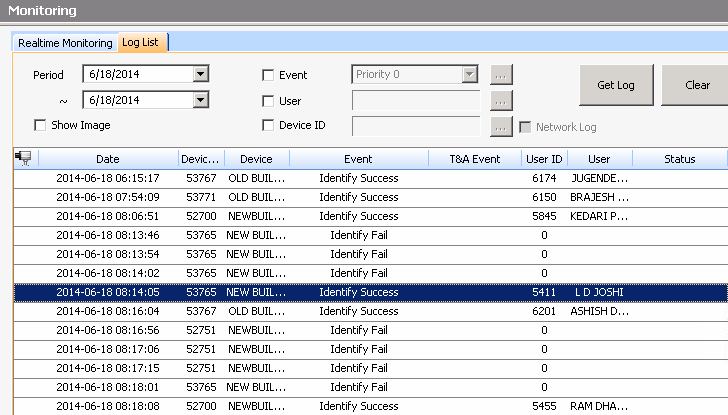
Open BioStar Client and go to [Monitoring] menu. Select the date and device where false rejection happens. As shown below, there are numerous number of “Identify Fail” logs. From this log, we can assume that these users tried multiple times to get “Identify Success”.
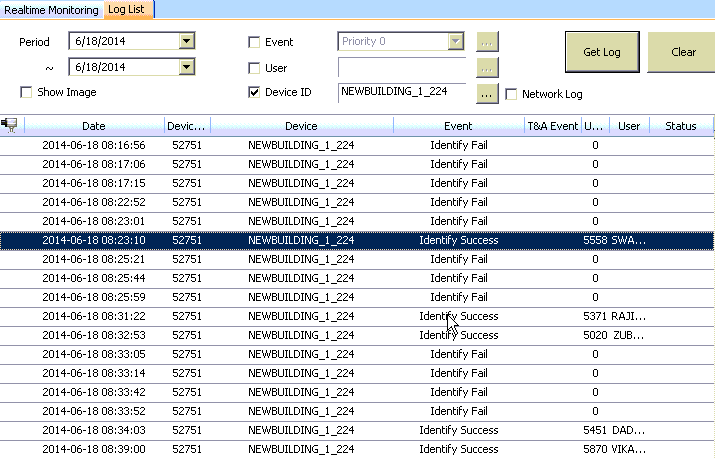
Look for the user ID who is experiencing “Identify Fail” more than three times.

Now, move to [User] menu and search the user ID. It is important to check the fingerprint quality.
When the templates location is different between each template, users should enroll their fingerprint again. Please see below examples.

[Example 1]

[Example 2]
When there are few number of minutiae (check the number of blue circles), users should enroll their fingerprint again. Alternatively, they can enroll other fingers. Please see below examples.

[Example 3]

[Example 4]
Below example is another bad fingerprint template. This kind of template is created when users only place their finger tips. In this case, users should enroll their fingerprints again.

Fingerprint re-enrollment
When you try to enroll the fingerprints again, please follow the steps below.
** Refer to the following article: [Both BioStar] Fingerprint Enrollment Guide
1. Click Delete button to delete previously enrolled fingerprint.
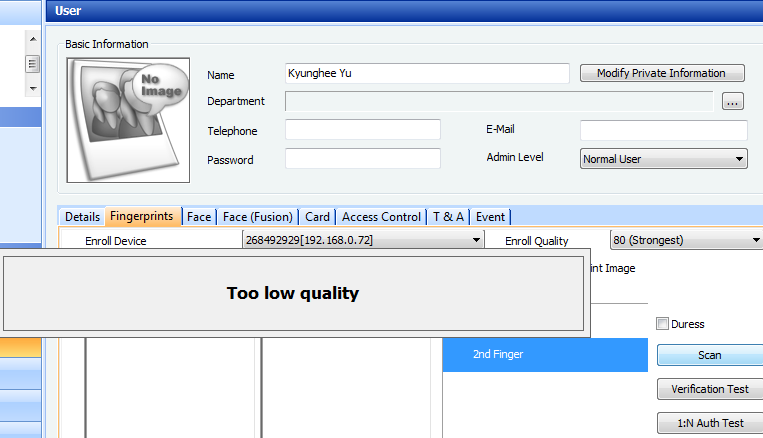
2. Set Enroll Quality to 80 (Strong).
3. Click Add then click Scan to scan your fingerprint.
4. When you have Too low quality error, please try again with different finger.
When fingerprint is small or dry, the templates quality may low.