Certain users of BioStar 2 who use custom https domain for connecting BioStar 2 instead of using an IP address cannot use the default certificate which provides from BioStar 2 Software. It is because BioStar 2 software provides an IP based HTTPS certificate.
>The default certificate is embedded in BioStar 2 installation file.
This article is for users who have personally created or have obtained 3rd party private certificates for BioStar 2
- Re-created certificate using BioStar 2 software
- Creating a certificate using Open SSL
- Obtained from private certificate companies
- Obtained from public certificate companies
You can face below issues if you have not bundled your certificate properly and applied it correctly to BioStar 2
or where certificate does not match with Java KeyStore
Can not reset nor save[Device Group List]
Can not reset nor save [Device List]
Can not reset nor save [Access Level Door List]
Can not reset nor save [Elevator Group List]
Can not reset nor save [User Group List]
Can not reset nor save [User ID]
Can not call [User ID Sync]
Can not reset nor save [User ID & Email]
Can not call active directory and causes [Automatic Log Out]
If you are facing above issues, first check your certificates for BioStar 2
Check Point 1. File size of your certificate located in C:\Program Files → BioStar 2(x64) → nginx → conf

As you see in this image, you can see a [key file], a [crt file] and an incorrectly combined [p12 file]
A properly bundled certificate [crt file] size must be greater than [p12 file] size
Check Point 2. Validity of the certificate
- Open your crt file using [Crypto Shell Extensions]

b. Go to certification Path to export certificate to re-bundle certificate properly

c. Click on [Second stack certificate] and click[view certificate]

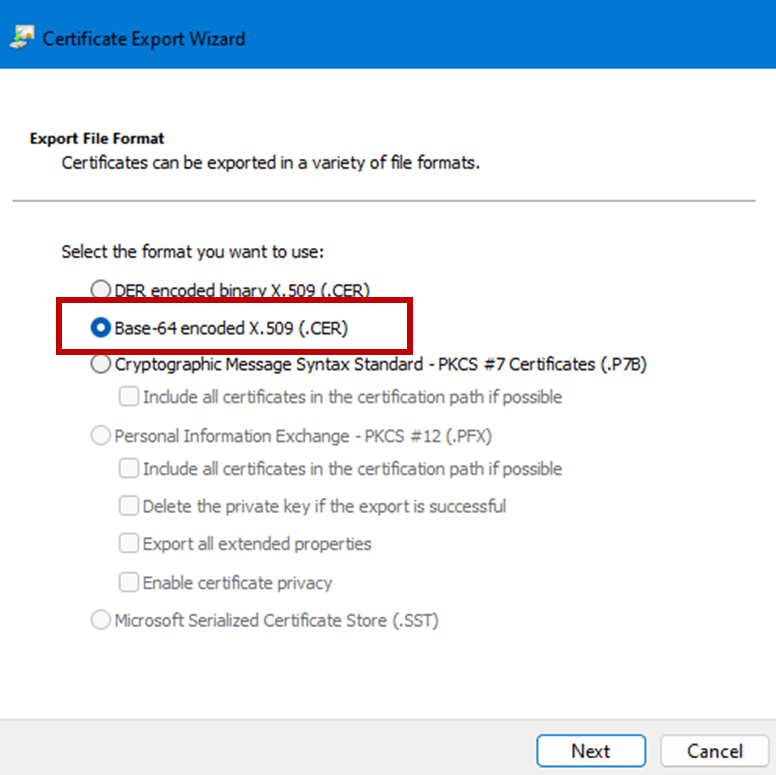
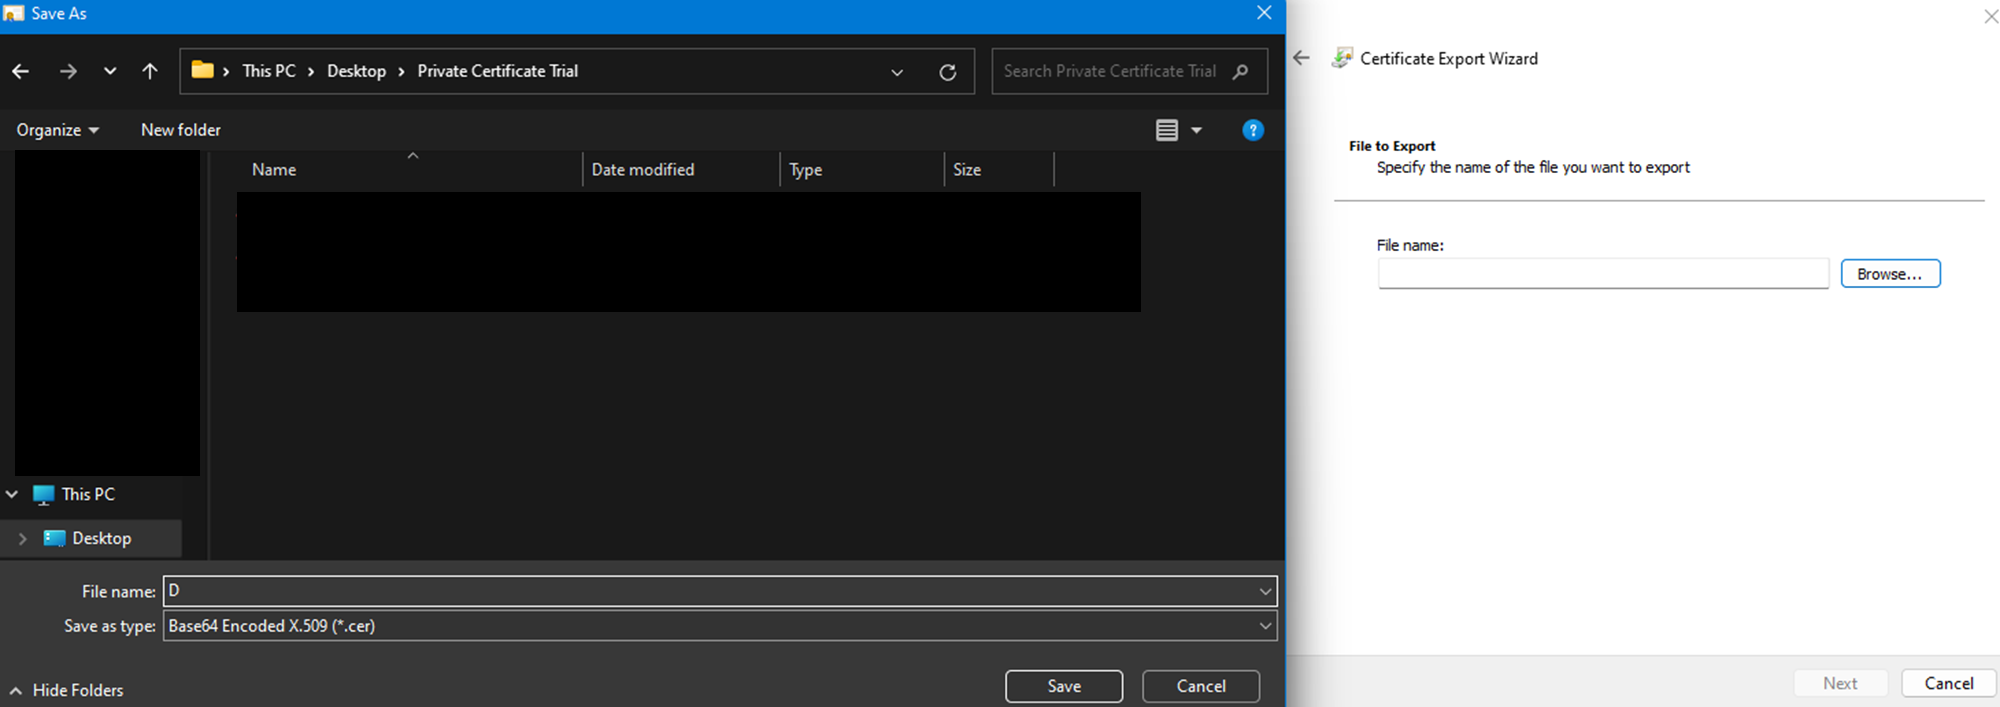
d. Export the file in [Base- 64 encoded X.509 (.CER)]
>Since BioStar 2 and P12files use Base 64, the format MUST be Base -64
e. Have a separate folder for the newly bundled/created certificate, name of the file could be user's preference
f. Repeat the same process for [Root Certificate CA]
g. Now, in the separate folder for newly bundled/created certificate must have
- biostar_cert.key
- biostar_cert.p12 (incorrect certificate file)
- biostar_cert.crt
- Newly exported second stack certificate file [name.cer]
- Newly exported Root CA [name.cer]
h. Download XCA Program
- Download XCA Program: Request, create, manage Open SSL based certificates
i. Run XCA Program → File → New Database → Select the folder created solely for newly bundled/created certificate
Note: Password is not a must factor, but is recommend to add

j. Click Import → Select below files from the folder created solely for newly bundled/created certificate
1. biostar_cert.crt
2. Newly exported second stack certificate file [name.cer]
3. Newly exported Root CA [name.cer]
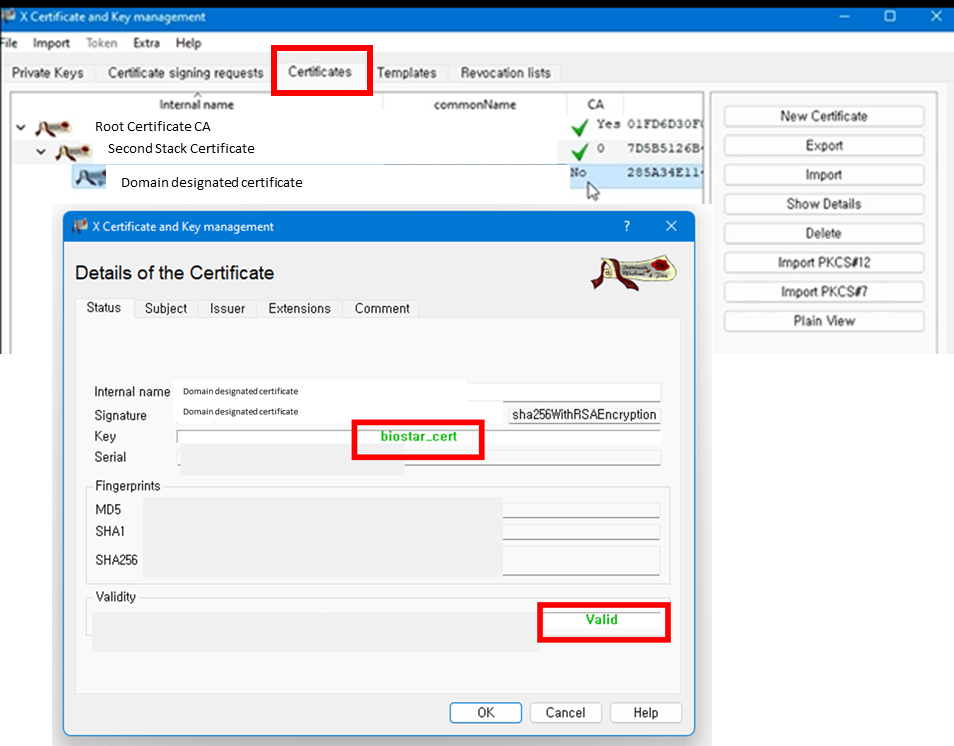
k. After importing files click and check to see if the certificates are stacked in three (some certificates could be more than three)

l. Select all three files and then click → Export
Caution : File Name must be biostar_cert , File Format must be PEM Chain(*pem)

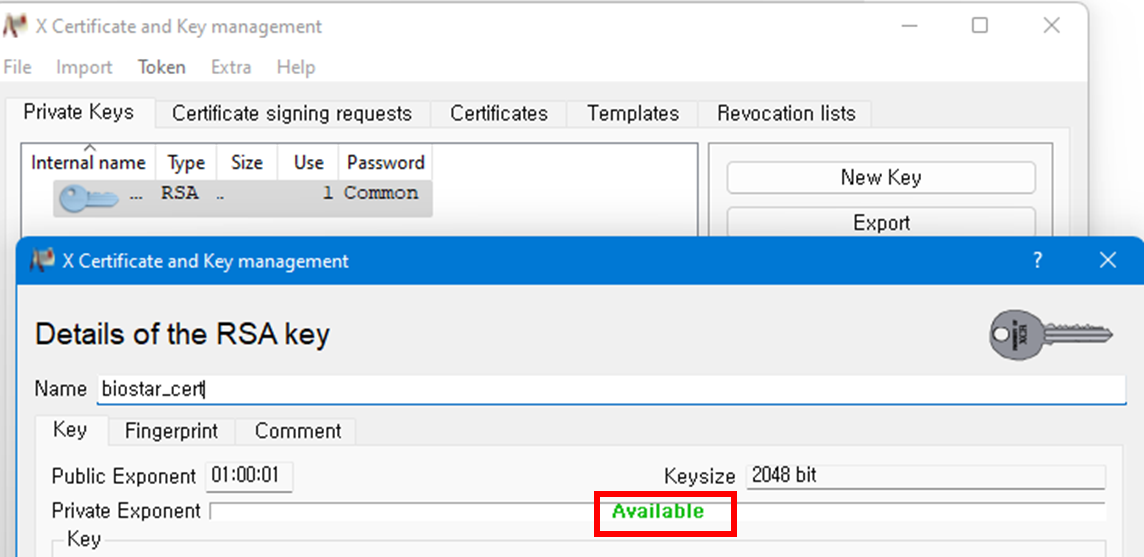
j. import cert.key file in to private keys

k. check the avialibty of the private key & validity of the cert.key with the newly made bundled certificate
&
l. After checking the validity of the cert.key → Go back to Private Key → Export the key , this newly made cert.key will be the new key for the newly bundled certificates
Caution : File Name must be biostar_cert_key , File Format must be PEM.private(*pem)

j. Go back to → Certificates → ONLY Click on the lowest stack and export the file 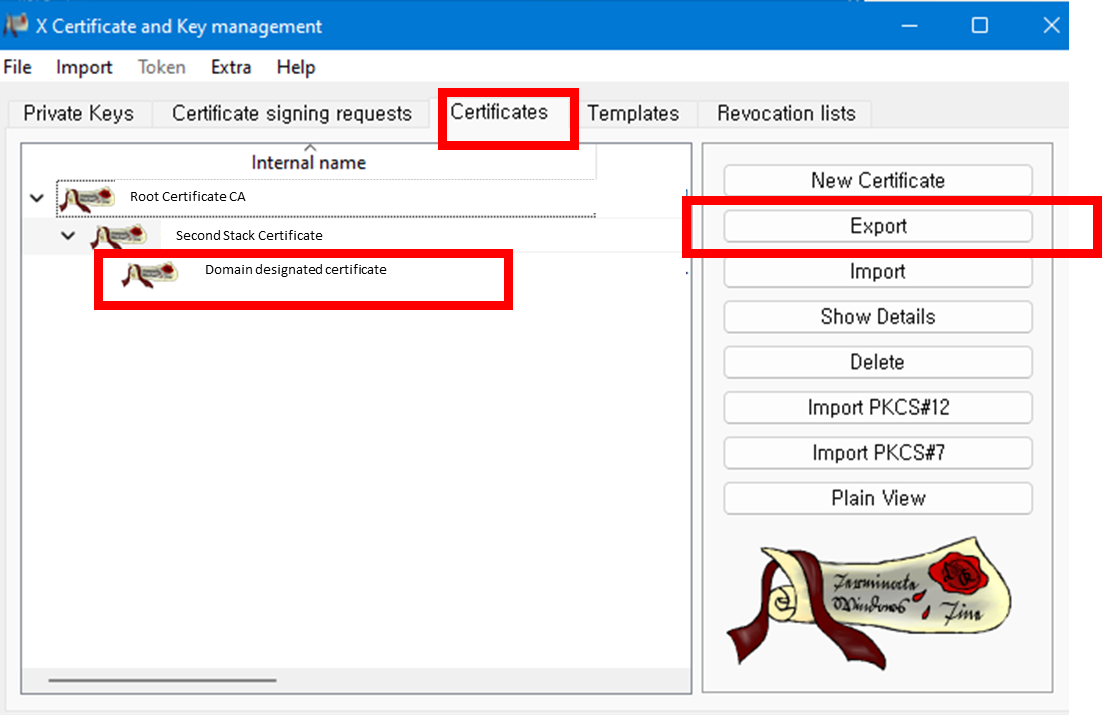
Caution:File Name Must be biostar_cert_new File Format Must be PKCS#12(*pfx) or PKCS12(*p12)
Create Password to your liking
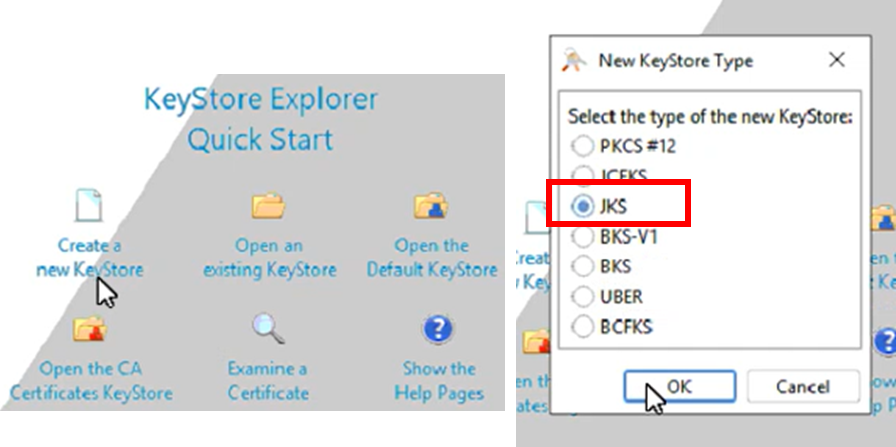
k. Install KeyStore Explorer to combine/bundle newly made certificates correctly
- Download KeyStore Explorer: create, manage JKS (Java Key Store)
l. Open Key Store → Create a new Key Store → JKS → import the original biostar_cert.p12 (incorrect certificate file)

contact your designated SUPREMA TECH SUPPORT or create a new ticket to receive the password for the original bopstar_cert.p12 password
m. click on import key pair → PKCS#12→ import the newly made biostar_cert.p12
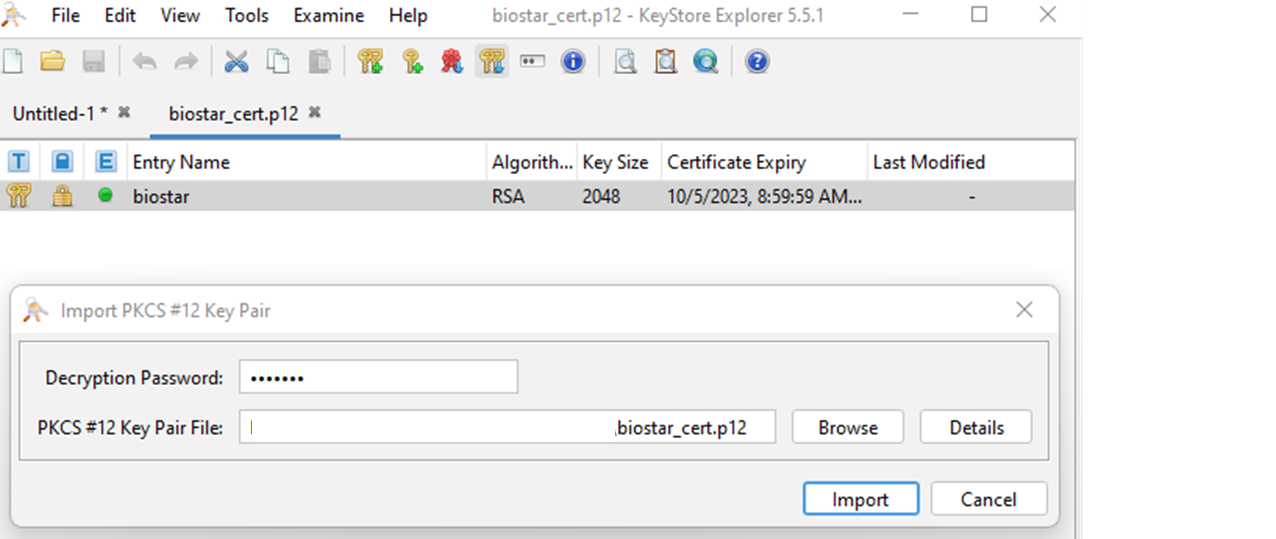
Caution: Import → Alias name must be biostar

Enter New Password as you desire →Click Ok
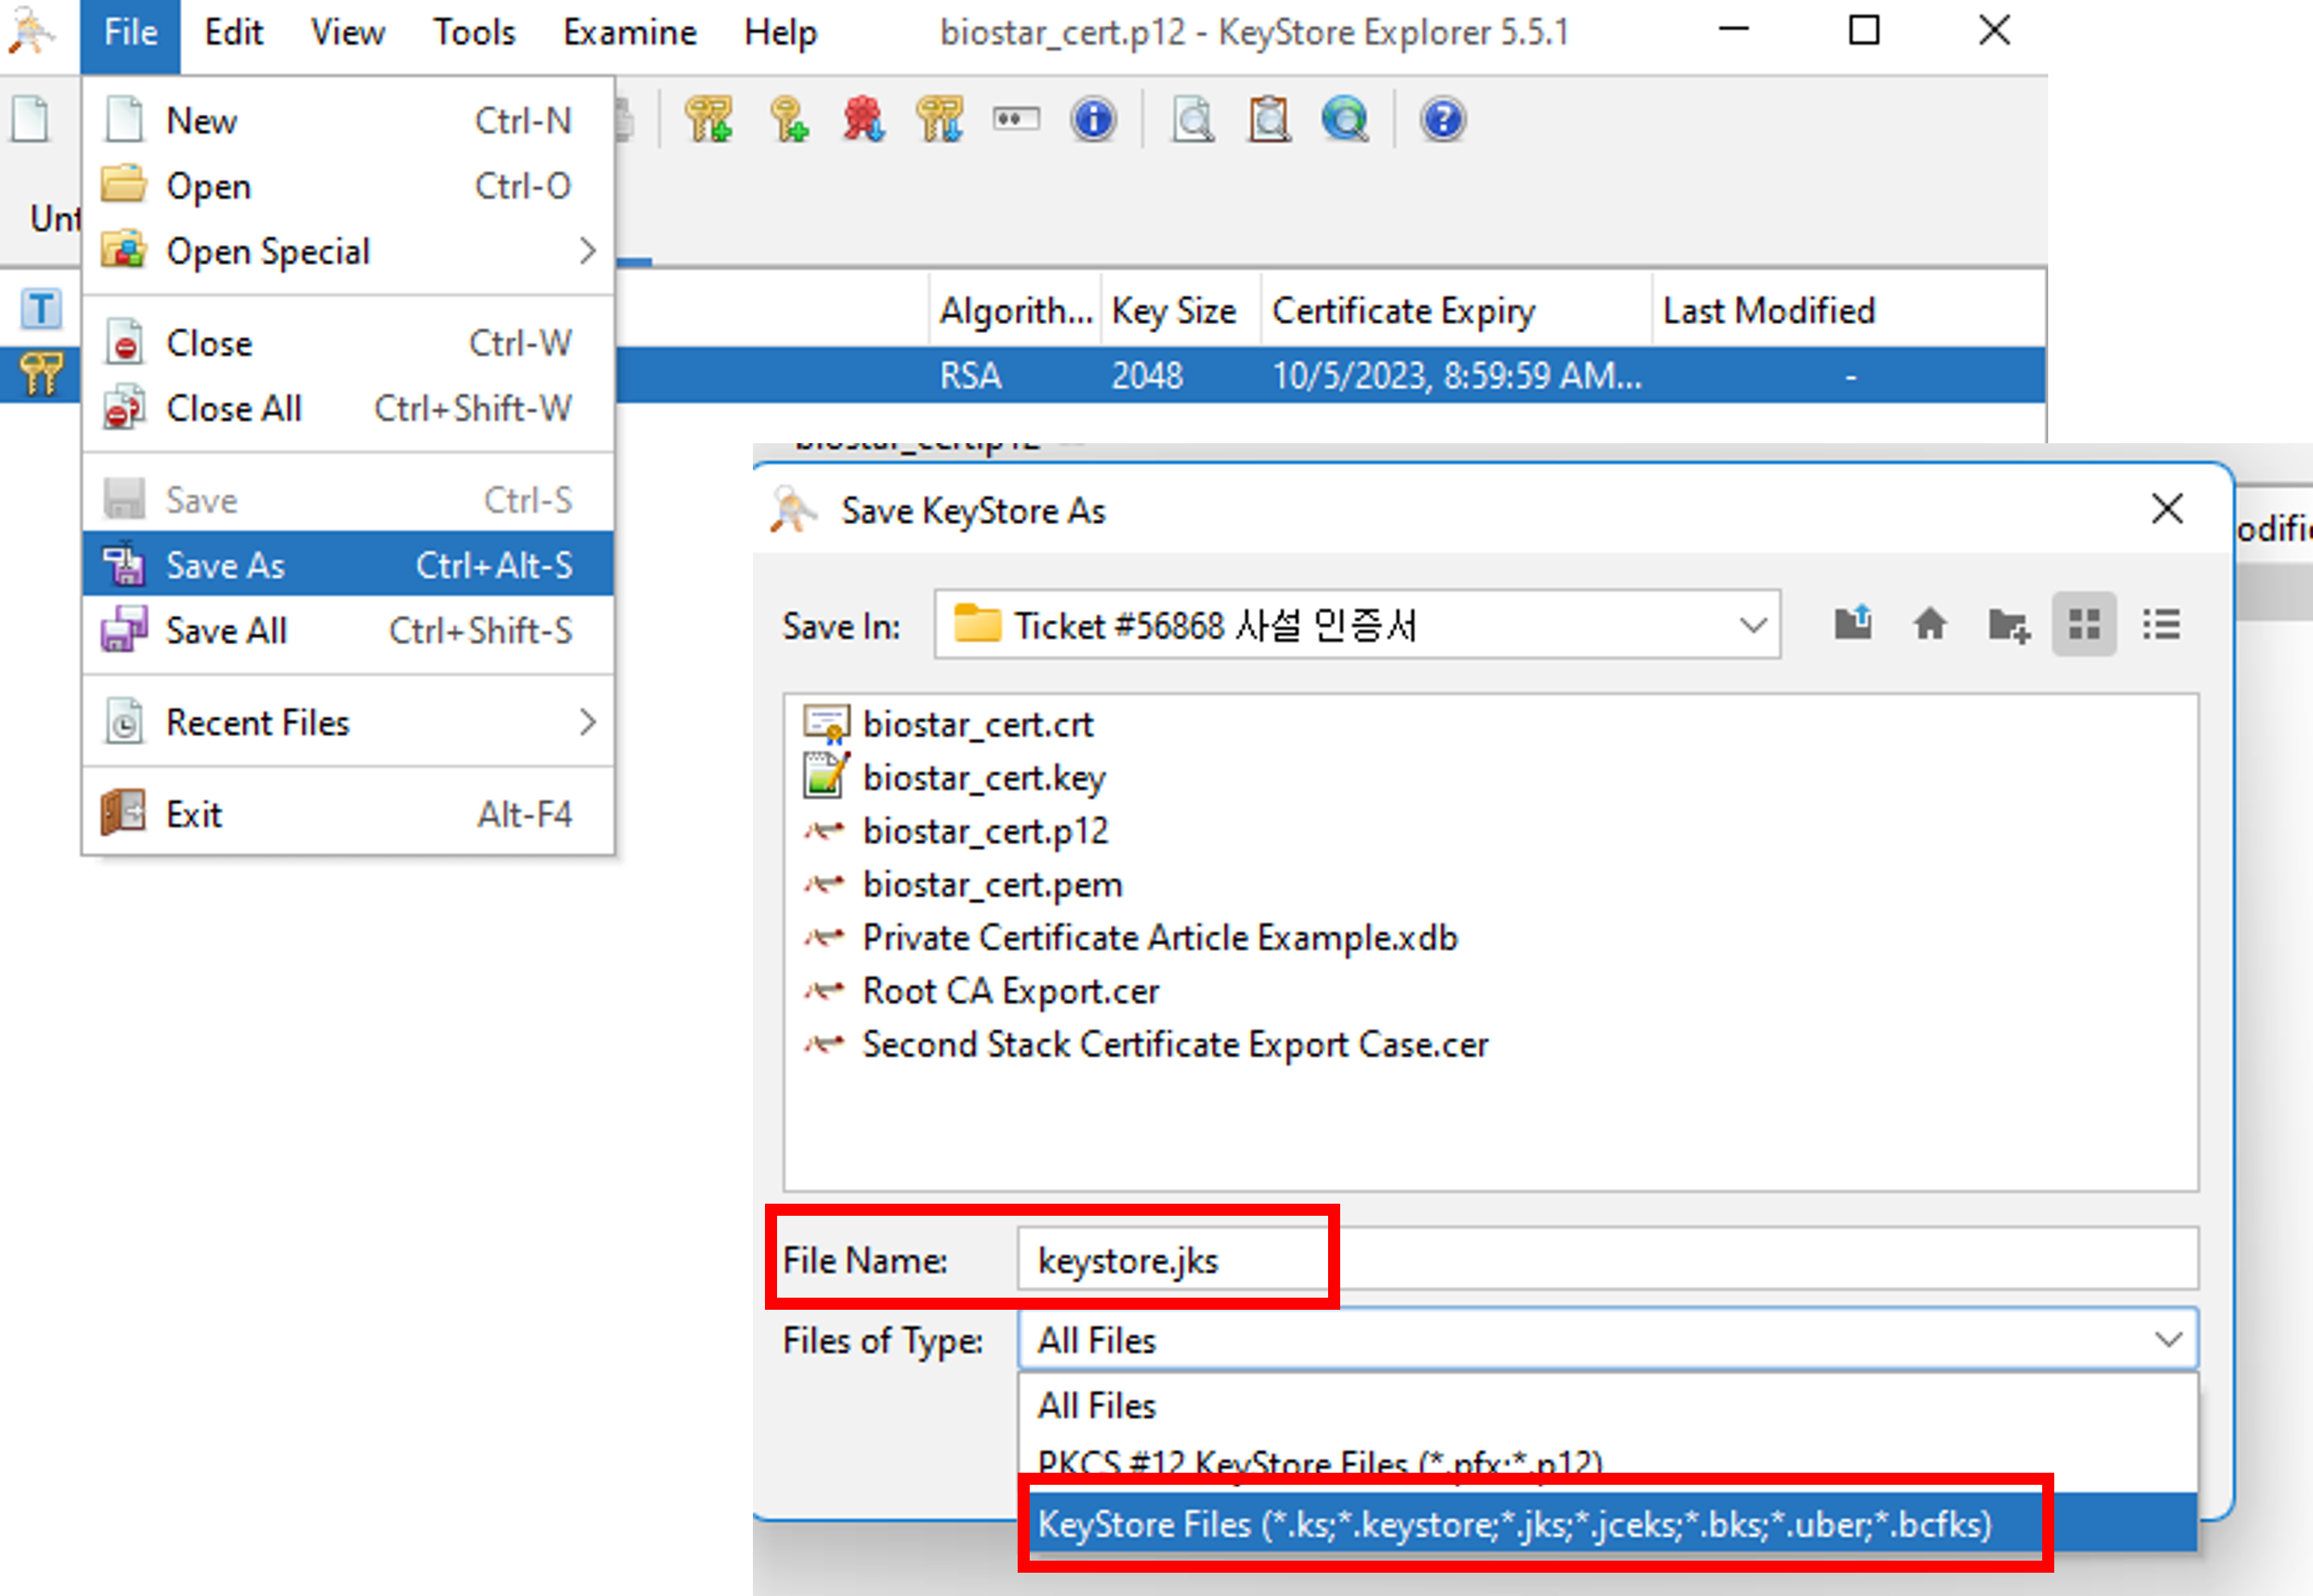
n. Save the newly created key pair
Caution: File name must be keystore.jks File format must be KeyStoreFiles
o. Go to BioStar 2 File → nginx → conf
>Make a back up file before applying the new combined/bundled certificates
p. Final result of newly combined/bundled certificates must be as below located in BioStar 2 File → nginx → conf
Bundled/Combined certificates name must be
- biostar_cert.crt (biostar_cert.pem (*pem)chain type)
- biostar_cert.p12 (newly created PKCS#12(*pfx) or PCKS#12(*p12)
- biostar_cert.key (biostar_cert_kery (*pem)
- keystore.jks