Affected Version: BioStar v2.9.4 or above
Affected Products & Versions: CoreStation v1.7.1 or above
Suprema integrated a “Wireless Door Lock” from a manufacturing company called Uhlmann & Zacher (U&Z) into CoreStation. With CoreStation v1.7.1 and BioStar 2 v2.9.4, you can use the wireless door lock feature.
With this new feature, users can use wireless communication to authenticate even at a Wireless Door Lock located at a remote location from the CoreStation.

Note that
What you need to know before starting "Wireless Door Lock Integration" of CoreStation:
1) Only CSN Cards that types of MIFARE or DESFire can be supported for this function.
2) This feature operates on the basis of related license activation.
3) The supported OSDP version is v2.2 for now.
Background
Below the v.2.9.3 or lower version of BioStar 2, the configuration of the door lock was possible only through physical wiring. Accordingly, for aesthetic reasons or security reasons, the need to introduce a door lock capable of wireless connection has been raised.
To satisfy this market need, Suprema has launched the "Wireless Door Lock" integrated with U&Z.
Basic Concepts
- Configuration

- Data Processing Order
1) Scan the enrolled card on the Wireless Door Lock
2) Send the card data to the OSDP antenna via wireless communication(BLE)
3) Send the card data to the CoreStation via OSDP
4) CoreStation compares the received card data and stored card data in it and sends the results to the OSDP antenna via OSDP
5) OSDP antenna sends the result to the Wireless Door Lock via wireless communication(BLE)
6) Wireless door lock displays the results of either Green LED or Red LED depending on the results from CoreStation
Note that
When adding the OSDP antenna and Wireless Door Lock in BioStar 2, you can see the icon on each product as below.
- OSDP Antenna

- Wireless Door Lock
1) Knob type

2) Handle type
Major Features
Please find the below major features on "Wireless Door Lock"
<Feature 1>
You can add up to TWO OSDP antennas and TWELVE Wireless Door Locks per ONE CoreStation.
Note that
- The ONLY ONE OSDP antenna module can be connected per ONE RS-485 port of CoreStation via OSDP.
- Up to SIX Wireless Door Locks can be added per ONE OSDP antenna module.
<Feature 2>
It needs to have a specific license to use this new function “Wireless Door Lock“
So you SHOULD purchase the specific license for this function FIRST and activate the license file you receive after purchase in BioStar 2. Only after that, you can add the OSDP antenna on CoreStation in BioStar 2.
Note that
For more details about how to activate the license file in BioStar 2, please refer to the begging part of Execution Procedure in this article.
<Feature 3>
You should purchase and use separately the TWO types of products (OSDP Antenna and Wireless Door Lock) manufactured by U&Z to use this new feature. To check which models are available in each product, please refer to the below.
- OSDP Antenna : Only one model can be supported.
- CX8936 BLE
- Wireless Door Lock : Two types of model can be supported (Knob type or Handle type)
- Knob type : CX212x
- Handle type : CX217x
Knob type

Handle type

<Feature 4>
When using this new feature, you can use the below functions by setting in BioStar 2
A. Use the Wireless Door Lock as Entry device or Exit device when configuring the door
Note that
- If you select the Wireless Door Lock as Entry device, you SHOULD select the Wireless Door Lock as Exit device.
- If you select the Wireless Door Lock as Entry device or Exit device, there is NO POPUP for relay settings

B. Set and use Trigger & Action (How to configure Trigger and Action on Setting)
C. Set and use APB function in Zone (How to configure an Anti-Passback)
D. Can use for Access Control
Note that
- Only CSN Cards that types of MIFARE or DESFire can be supported for this function
- You CAN set the schedule about the set Access Group
<Feature 5>
When using the Wireless Door Lock, the user's card data is encrypted by SCB key and then, the encrypted data is sent to the OSDP antenna. The key is generated automatically when adding the CoreStation in BioStar 2.
Note that
If adding the OSDP antenna on CoreStation normally, the popup for setting SCB KEY in CoreStation is inactivated.

<Feature 6>
When trying to authenticate at the Wireless Door Lock using the CSN card, you can get the below results.
- If the authentication SUCCEEDS, the Green LED is turned on the Wireless Door Lock
- If the authentication FAILS, the Red LED is turned on the Wireless Door Lock
When receiving New fresh U&Z Devices
1. You should remove the power sticker for cylinders or add battery for the handle,
2. You should Teach :
- For the handle only the service key, to do it just present the Service Key card in front of the handle,
- For the cylinder, you will need to teach the service key then the Battery change then the dismount card.
3. On the Module OSDP or WIEGAND or Switching module, you will see a rotary switch, we recomend you to set it on 0 (Home position). Other position could be used for manual setting.
Precautions
1. You should select the Baud Rate of CoreStation as 115200 about the connected port with the OSDP antenna, if the product set including OSDP antenna and wireless door lock is purchased through Suprema.
Note that
However, if the above product set has been purchased through other roots but not Suprema, you should set the Baud Rate of CoreStation as 9600 about the connected port with the OSDP antenna.
2. You can set the OSDP ID from 0 to 119 per ONE OSDP antenna module.
Note that
You CAN NOT change the OSDP ID on the OSDP antenna after you add the OSDP antenna to the CoreStation normally.
3. You CAN NOT directly enroll the card to be used by reading the card on the Wireless Door Lock. So you need to enroll the card to be used on the other added device in BioStar 2 in advance and then, synchronize the enrolled card to the CoreStation.
4. You can check the BATTERY Status of the Wireless Door Lock in the Wireless Door Lock Status of MONITORING in BioStar 2.

Note that
You can get the changed battery status of Wireless Door Lock whenever the battery status has been changed by selecting options among the 3 types of battery status(Low battery level, Critical battery level and Empty battery) and setting the alert with it at Alert in Settings of BioStar 2.
5. The license purchase unit is based on ONE Wireless Door Lock.
ess Door Lock
Execution Procedures
Note that
You SHOULD purchase the license first before following this procedures.
So please contact our sales representative in your region first and then, purchase the license file depending on the NUMBER of Wireless Door Lock you want to use.
Step 1. Set the CoreStation and enroll the card
Step 1-1.
Once you have purchased the license, log in to BioStar 2 and go to LICENSE in Settings.

Then, go to Deivce License and click Browse

After that, select and open your license file. Then, you can find the information on the license.
At this time, click Activate if there is no problem.

Step 1-2.
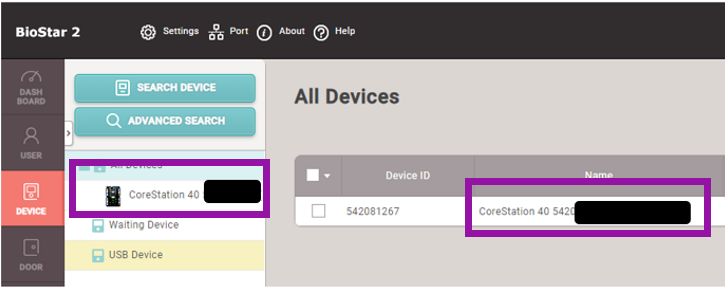
Add your CoreStation in DEVICE
And update the f/w to v.1.7.1 or above

Step 1-3.
Enroll the card to be used via other Suprema devices first and then, synchronize the user's data to the CoreStation. For the synchronization, there are automatic method and manual methods as the below.
Note that
Only CSN Cards that types of MIFARE or DESFire can be supported for this function.
- Automatic method: Go to Server in Settings in BioStar 2 and go to User/Device Management. And then, select the proper option in Automatic User Synchronization. For more details, please refer to the following article. How to synchronize devices with the server

- Manual method:
Option 1.
Go to USERS and select the user in which the card has been enrolled. Then, click Transfer to Device and select your CoreStation. And then, click Transfer.
Option 2.
Right-Click on the added CoreStation in BioStar 2. And them, click "Sync Device" or "Delete data & Sync Device"

Step 2. Connect the OSDP antenna and CoreStation via RS-485
Step 2-1.
Connect each RS-485 port of both the OSDP antenna and CoreStation using a cable.

Note that
Please refer to the cabling for the OSDP antenna.
- RS485A1 and RS485B1 : for RS485 communication.
- Vin and GND : for supplying the power

Step 2-2.
After that, go to DEVICE in BioStar 2 and then, right-click on the added CoreStation 40. Then, selelct "Add OSDP Device" and click OK

Step 2-3.
Then, you can find the RS485 port available now. At this time, select the Port of CoreStation which is connected to the OSDP antenna

Step 2-4.
Then, you can find the information for the connected OSDP antenna into the selected port. If the information is correct, then click Apply

After that, you can find the added OSDP Antenna on your CoreStation. 
Step 3. Add the Wireless Door Lock on added OSDP Antenna
Note that
It is possible to automatically add a Wireless Door Lock to the OSDP antenna only when the Wireless Door Lock is in the state of service mode first.
To make the Wireless Door Lock the service mode, the "SERVICEKEY" card is scanned on the Wireless Door Lock.
Step 3-1.
Scan the SERVICEKEY card on the Wireless Door Lock to be used. Then, If the SERVICEKEY card is recognized normally, the LED of the Wireless Door Lock will turn BLUE.
Note that
Since LED automatically turns off after a few seconds, you should proceed with the next step before that

Step 3-2.
Before the BLUE LED on the Wireless Door Lock goes off, Right-click the added OSDP Antenna and select "Auto Add Wireless Door Lock"

Step 3-3.
Then, the OSDP antenna will search for the Wireless Door Lock in the service mode and then, add the Wireless Door Lock automatically if there exists the Wireless Door Lock in the service mode within the Bluetooth communication radius. If added automatically, you can find the below pop-up in BioStar 2.

Step 3-4
Then, to complete the adding the Wireless Door Lock, you need to right-click on the added Wireless Door Lock and select "Activate Wireless Door Lock"

Step 3-5
Then, finally, you can find that the Wireless Door Lock is added normally as the below.

Step 3-6
To verify this function, scan the enrolled card on the Wireless Door Lock.
- If the authentication SUCCEEDS, the Green LED is turned on the Wireless Door Lock
- If the authentication FAILS, the Red LED is turned on the Wireless Door Lock
Example) Authentication success

You can find the authentication results as well in the Event Log of MONITORING in BioStar 2
Demo