Intelligent Slave is a function that enables 1:1 or 1:N matching on Suprema biometric devices and transmits the authentication result to the OSDP card data when biometric authentication is performed in an environment where a Suprema device is connected to an iSTAR controller.
For customers who want to manage user information directly in the Suprema device and send the verified user’s card data from the Suprema device to the iSTAR panel, this feature is available only through custom firmware.
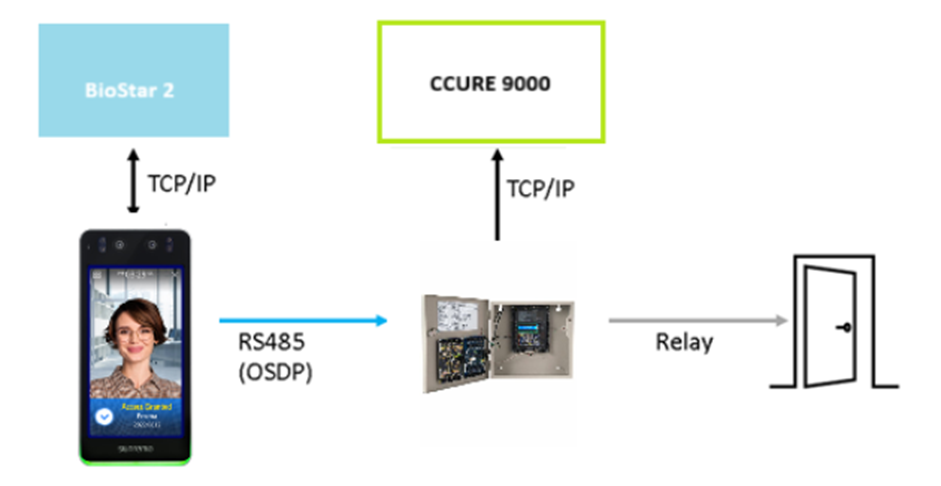
[System Configuration for Intelligent Slave]
Firmware Information and Supported Devices
Component | Required Version |
BioStar 2 | 2.9.6.40 |
C•CURE 9000 | v3.0 |
Integration Plugin | Advanced version |
Device Models and Firmware
Device Model | Firmware Version |
BioStation 3 | bs3-all_v1.3.1_20250724_sign |
iSTAR Ultra SE | 6.8.3, 6.9.3, 6.9.7 |
iSTAR Ultra G2 | v6.9.7 or later |
How to Configure Intelligent Slave

Step 1.
Confirm that both BioStar 2 and the device firmware versions support Intelligent Slave.
Step 2.
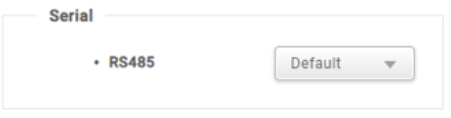
Verify that the device is set to the default RS-485 mode.
Step 2-1.
Ensure that the RS-485 baud rate matches the baud rate configured on the iSTAR panels.

Note:
Once a Suprema device is connected to a third-party ACU as a slave through RS-485 (OSDP), the Suprema device automatically operates as an OSDP peripheral.
Step 3.
Check Intelligent Slave at the bottom of the device detail page.

- Exception Code:
Default is [Disabled].
Suprema devices may send aggregated accurate logs in exceptional cases such as authentication failures or unverified card data.
Depending on the third-party ACU requirements, you may enable this option and configure decimal or hexadecimal values.- Decimal: 0 to 18446744073709551615
- Hexadecimal: 0 to FFFFFFFFFFFFFF (up to 8 bytes)
- Output Information:
You can choose to output either Card ID or User ID upon successful authentication. - OSDP ID:
Enter the OSDP address of the device.
The value must be between 0 and 10.

Step 4.
Create a new user in BioStar 2 to synchronize the user data to the connected Suprema device.
Also confirm that user verification/authentication works successfully.
Step 5.
Connect the Suprema device to the iSTAR panel via RS485 (OSDP) and verify operation.
Important Notes
- Baud Rate Configuration:
Must be set to 9600.
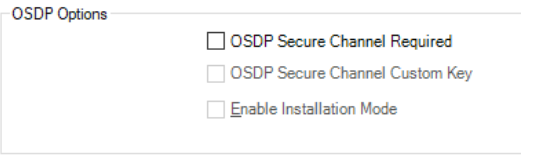
The default value (115200) does not work with iSTAR panels. - You must uncheck the following OSDP options:
(Options not provided in the text — please add if needed)